


Photo by Ferenc Almasi on Unsplash
Supercharge Your Postman Experience with Custom JSON Visualization


Introduction
As someone somewhat invested in backend programming ;-) , dealing with JSON data is like second nature to me. We often resort to using tools like Postman to test our APIs. But let's be real; Postman's built-in JSON visualization isn't the most intuitive. It's functional but leaves much to be desired. I used to manually copy and paste JSON data into JSON Editor Online for a better view, but that process got tedious.
And then it hit me: Why not build a custom JSON visualizer right inside Postman? That's how I ended up crafting this piece of code, which integrates a JSON Editor directly into Postman's Visualize tab. So let's dive into it and make your Postman experience supercharged!
What is Postman?
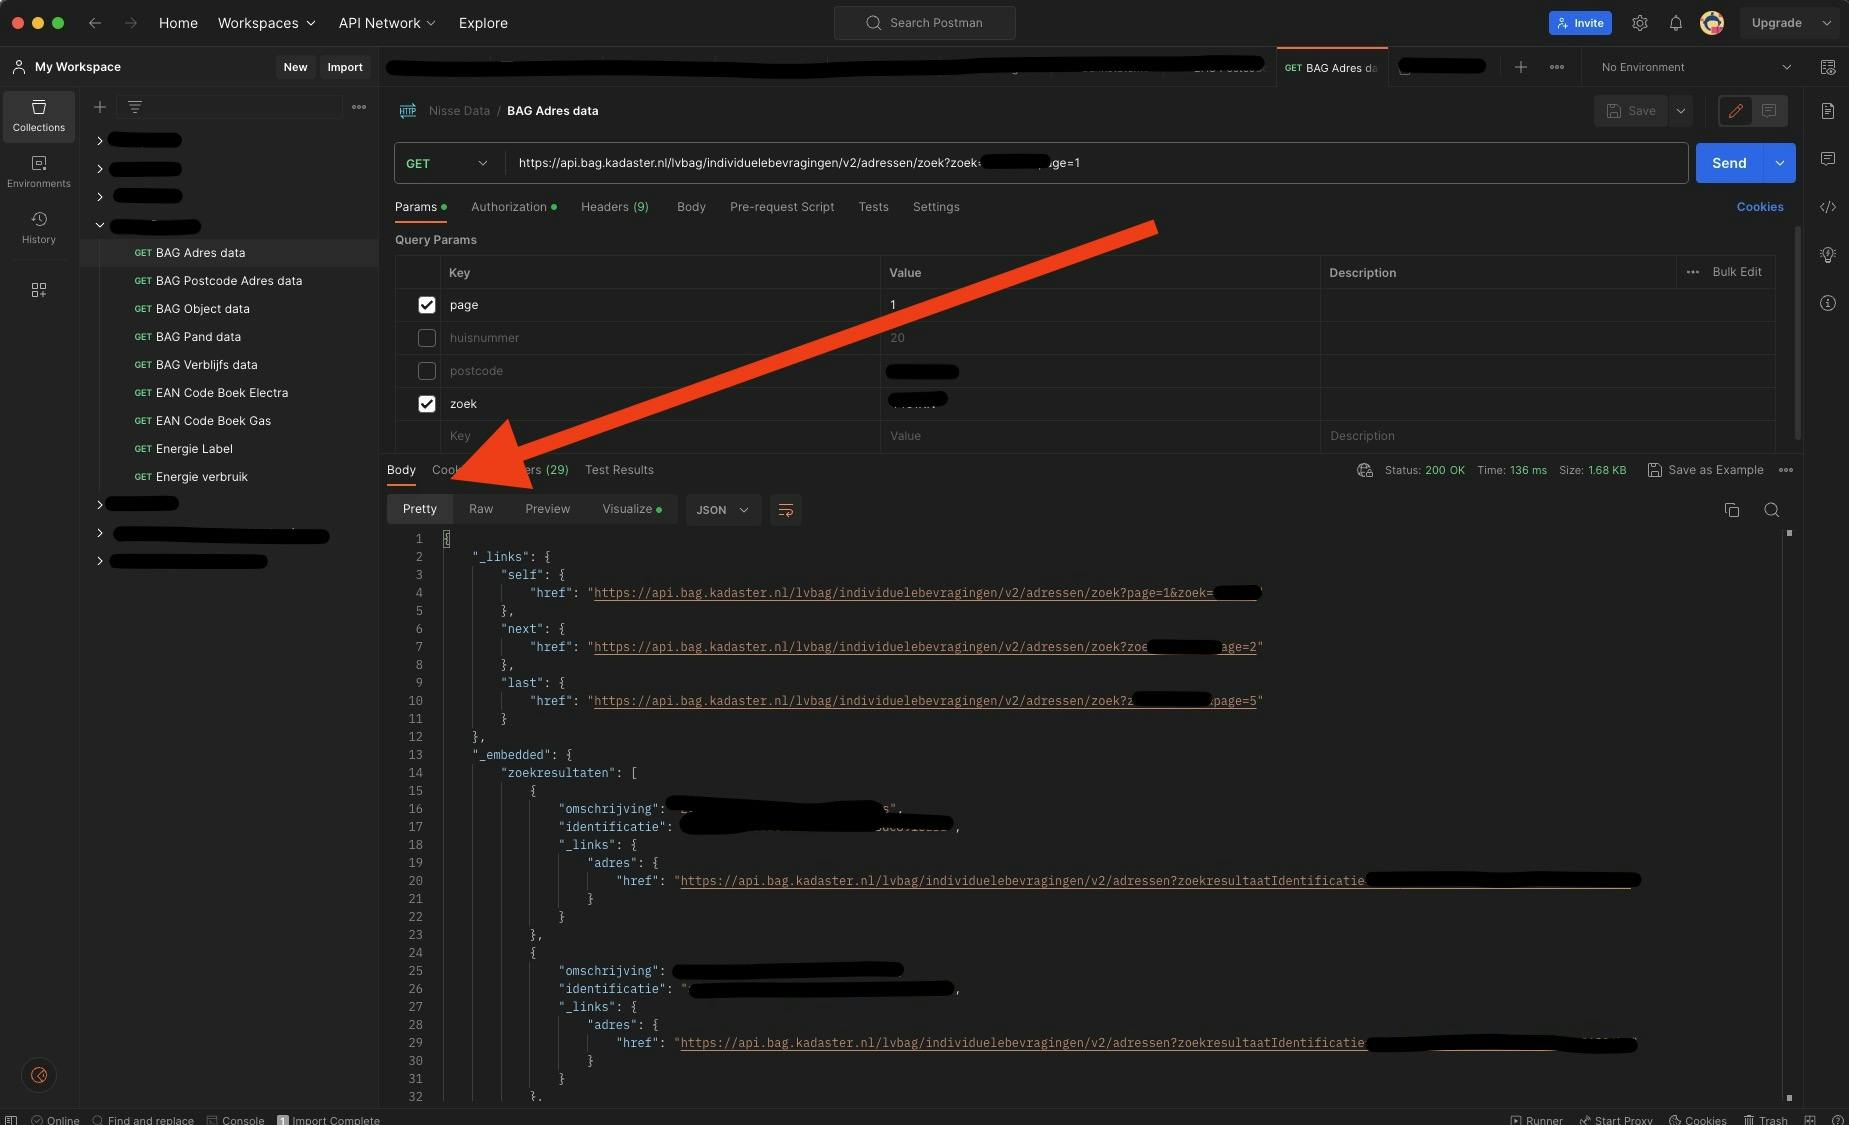
Before jumping into the code, let's address what Postman is, especially for those new to backend development. Postman is a popular tool used by developers for testing API requests. While it provides many functionalities, it falls short when it comes to effectively visualizing JSON data. Postman only offers basic code-level data folding and can't show you the specific number of elements inside a list at a glance.
Setting Up The Environment
First off, you need to decide where you want to implement this custom visualization. You can either set it up for a single API request or for an entire collection of APIs. Here's how to get it running:
For a Collection: Select the collection you want to enable this feature on from the left sidebar.
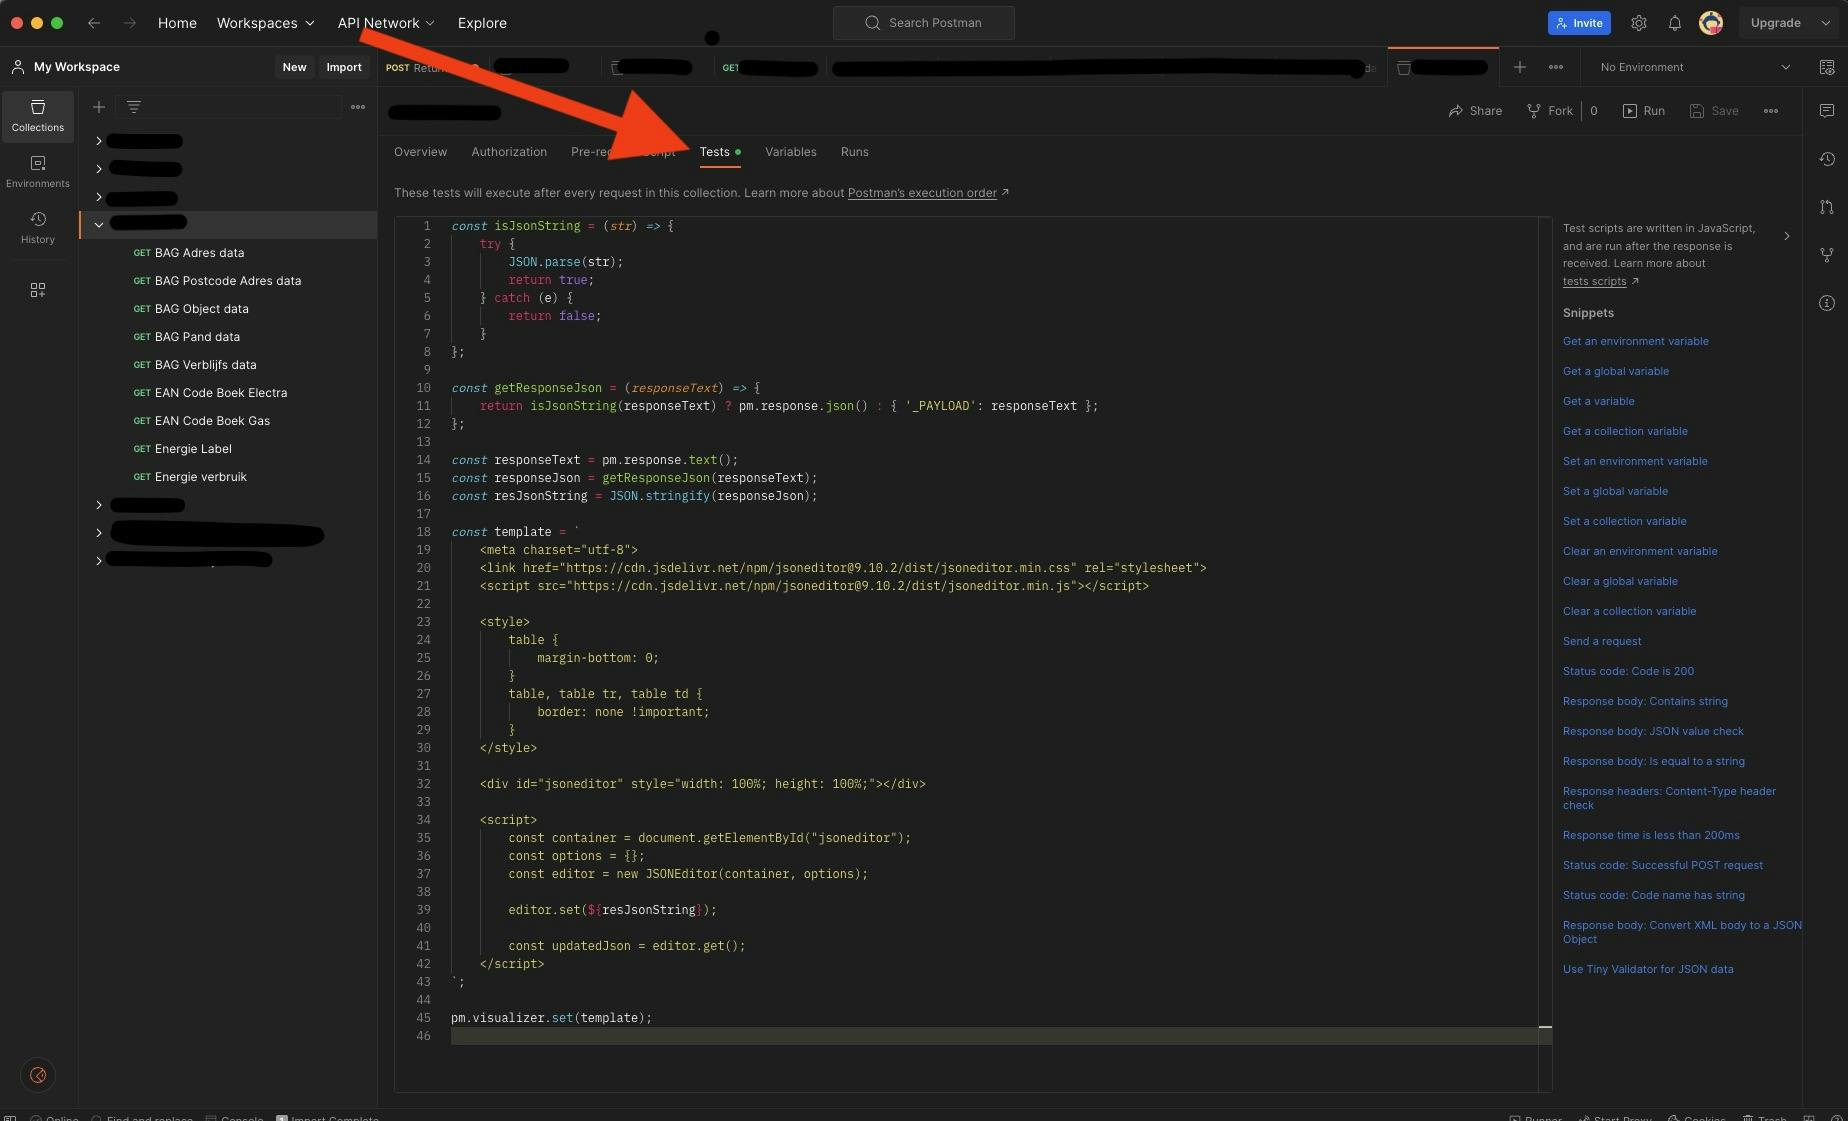
Navigate to the "Test" tab and paste the code into the text area.
- Voilà! Now all the API requests in that collection will display your custom JSON tree view in the Visualize tab.

Note: You can also implement this for a single API request. Just paste the code in the "Tests" tab of that specific request.
The Code Explained
Function to Check for Valid JSON
The first part of the code defines a JavaScript function named isJsonString(). This function takes a string as an argument and returns true if the string is a valid JSON object, and false otherwise.
// Function to check if a string can be parsed into a JSON object
const isJsonString = (str) => {
    try {
        JSON.parse(str);
        return true;
    } catch (e) {
        return false;
    }
};
Handling API Response
We then define a function getResponseJson(). It checks if the API response text is a valid JSON object using the isJsonString() function. If so, it returns the parsed JSON object; otherwise, it wraps the plain text in a JSON object.
// Function to get the JSON response or wrap the plain text response in a JSON object
const getResponseJson = (responseText) => {
    return isJsonString(responseText) ? pm.response.json() : { '_PAYLOAD': responseText };
};
Script to Render the JSON Tree View
The core of the code lies in the template variable, which contains an HTML and JavaScript mix that's rendered in Postman's Visualize tab.
// HTML and JavaScript code to render the JSON editor
const template = `
    <meta charset="utf-8">
    <!-- ... (omitted for brevity) -->
    <div id="jsoneditor" style="width: 100%; height: 100%;"></div>
    <script>
        // ... (omitted for brevity)
        editor.set(${resJsonString});
    </script>
`;
We utilize the JSON Editor library to render a tree view of the JSON object. The editor.set() method is where the magic happens; it takes the JSON object and visually renders it as a tree view.
The Complete Code
Here's the entire code that you'll need to paste into Postman's Test tab :
const isJsonString = (str) => {
    try {
        JSON.parse(str);
        return true;
    } catch (e) {
        return false;
    }
};

const getResponseJson = (responseText) => {
    return isJsonString(responseText) ? pm.response.json() : { '_PAYLOAD': responseText };
};

const responseText = pm.response.text();
const responseJson = getResponseJson(responseText);
const resJsonString = JSON.stringify(responseJson);

const template = `
    <meta charset="utf-8">
    <link href="https://cdn.jsdelivr.net/npm/jsoneditor@9.10.2/dist/jsoneditor.min.css" rel="stylesheet">
    <script src="https://cdn.jsdelivr.net/npm/jsoneditor@9.10.2/dist/jsoneditor.min.js"></script>
    <style>
        table {
            margin-bottom: 0;
        }
        table, table tr, table td {
            border: none !important;
        }
    </style>
    <div id="jsoneditor" style="width: 100%; height: 100%;"></div>
    <script>
        const container = document.getElementById("jsoneditor");
        const options = {};
        const editor = new JSONEditor(container, options);

        editor.set(${resJsonString});
        const updatedJson = editor.get();
    </script>
`;

pm.visualizer.set(template);
Wrapping Up
This simple code snippet significantly enhances Postman’s JSON data visualization. It's a small investment for a great payoff, saving you time and making your API testing process more intuitive. So go ahead, integrate it into your Postman environment, and let the magic unfold!