


In my new home I had the opportunity to build the Ultimate Ubiquiti home network. Finally internet everywhere with this simple guide for your network.
And all this in my new house. I wanted good internet via UTP and WIFI in all corners of my house. This article is about how I went about making this happen.
The most important thing that finally allowed me to do this properly is because the house had to be stripped quite far. The house itself is a great house, but a lot had to be done to make it our home. So before we started plastering, smearing, straightening, spraying and painting, I had first planned “Internet”.
Because everything was open, the most important thing was to pull good cables first. And then no Cat5 cables from aliexpress, but really good cables prepared for the future. CAT6A S/FTP cables of 100% copper. This S/FTP internet cable consists of twisted cable with foil shielding on the twisted cable pairs and foil shielding around the whole. Believe me these cables are not cheap. But with the 100% copper you have the maximum throughput speed and it doesn’t matter where you lay the cables (even if it is next to a high-voltage cable) you actually exclude any form of interference.
Crazy good cables and tools for Ubiquiti network
A good friend of mine said: “You have gone crazy! These cables are top notch professional cables, you will never get the speed that these cables can handle in your house.”
May I just point out that in 1990 friends of mine also said that my Seagate 20 MB HDD from my newly bought PC was over the top and would never fill it up. I rest my case!
So, if you do get started with your network, look to the future and make sure that you have equipment that can handle sufficient speed. Believe me, kids who keep nagging that they don’t have enough ping for Fortnite is no fun!
The pulling of cables did not always go well, unfortunately. For example, I removed a tube above the ceiling. And the cable rolled up neatly on top of my ceiling without getting a millimeter further.
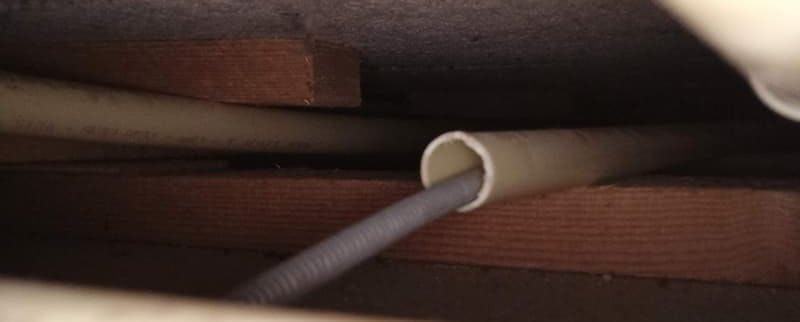
Not all went well with the network
Good pliers are a must! You have to cut, strip and stab quite a lot of cables, so make sure you don’t fiddle with scissors or a pocket knife and buy good stuff! That saves you a lot of time and especially frustration.
Once the cables were laid, I could assemble them. In some cases in a wall socket (in wall-mounted and surface-mounted) in some cases directly with an RJ45 connector and in some cases in a patch panel.
Patch panels to connect Ubiquiti unify gear
I had two patch panels. The first in the closet where my fuse box is and one on the 2nd floor in my house. From the closet where my fuse box is I could make connections to various places on the 1st floor and from my patch panel upstairs I could then provide the 2nd floor with network.
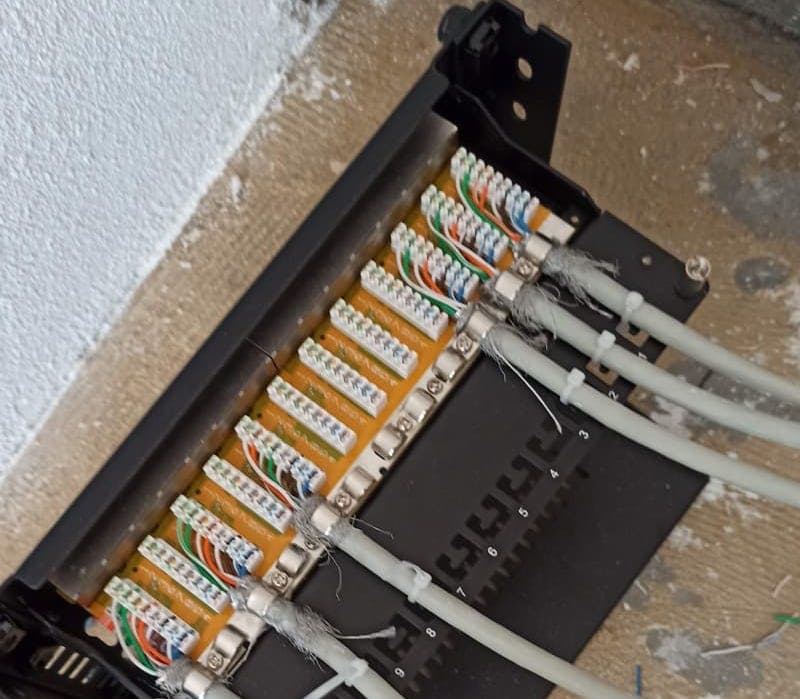
Patch panel neatly connected
Now you think, yes … but why didn’t you do all of that with Wifi Points. That is much easier. Yes, but keep in mind that your wired network will always be more stable than your WiFi network. No matter how good your WiFi Network is. And my wired network was again the basis for laying a good WiFi network.
I didn’t want to just hang the patch panel in my meter cupboard on the wall, I wanted it neatly with my switch, raspberry and power supply in 1 box, so I hung a 10″ Patch cabinet in where I could neatly store everything in it. Well … I would have preferred a 19 “full rack, but unfortunately I couldn’t think of a place my wife would agree to. So it became a (according to her) cute little casing.
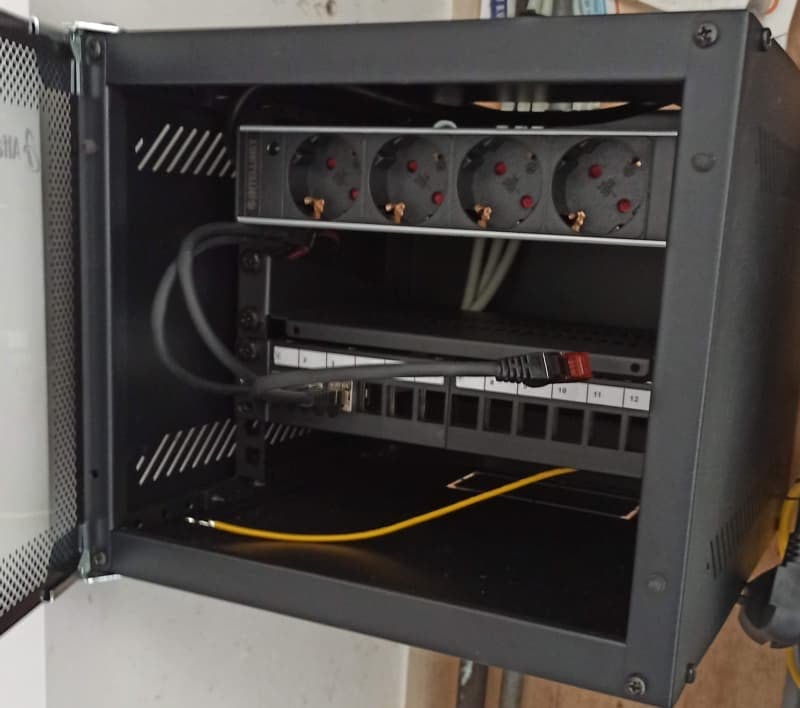
Small 10inch patch cabinet for Ubiquiti Network
I placed a Unify POE 8 port switch for the patch panels, both on the first and second floor. This switch has 4 normal ports and 4 POE ports with which I can, for example, supply a WiFi point with power. Ubiquiti has Power over Ethernet Wifi points but also 4 port switches that are work via POE.
Starting downstairs, 2 cables go to the first floor (1 on reserve) and 1 cable to an office on the first floor. I would have liked to run more cables downstairs, but because I could not get any cables pulled through the installation pipes that were in the walls and ceilings, I could unfortunately only connect 1 point.
I provided the cable to the office with a Unify POE 8 port switch to which I could connect a UAP-AC-Pro Wifi access point via a POE connection that could hang in the middle of the connecting living room. And via POE a Unify POE powered 4 port switch that I could connect under the TV via a cable to connect the TV, SONOS and XBox to the network.
On the first floor I pulled 3 CAT6a cables to the attic via the patch panel and the Unify POE 8 port switch. One to connect my SMA solar panel inverter. One POE cable to connect a Unify UAP-AC-M Wifi access point outside just under the rain gutter (more on that later) and 1 POE cable to connect a Unify POE powered 4 port switch in 1 of the bedrooms (via the ceiling) to close.
I also pulled a POE cable to an adjacent bedroom to also connect a Unify POE powered 4 port switch there. Both Unify POE powered 4 port switches are for the children who have 3 ports to connect their laptop, game console, etc.
Unifi wifi network connection
In order to also have internet outside and at the stables where our horses are (where I had to bridge about 60+ meters), I used 2 Unify UAP-AC-M Wifi access points. One access point was already hanging under the gutter outside the attic, the other I connected via a POE power adapter just outside the stable. Bridging the 60 meters with the internet works well. There is an Ezviz camera in the barn that can show real-time 720HD image material when necessary. Another advantage is that I now also have internet in the back of the meadow. Not much, but it is there.
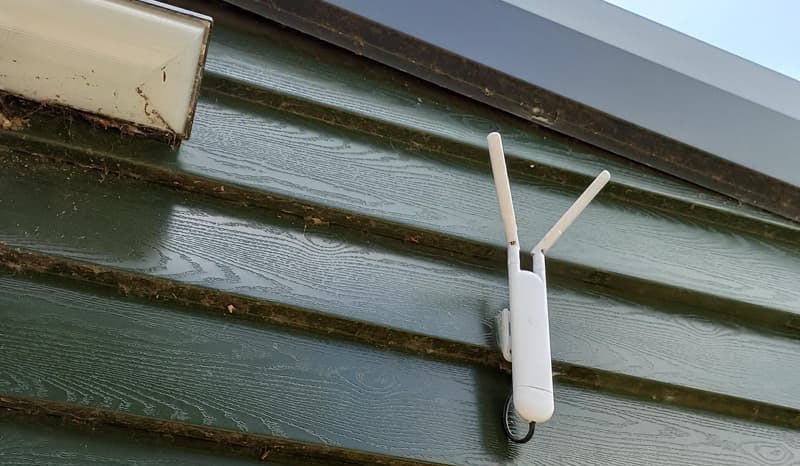
Ubiquiti Unify Wifi at the stables
To monitor the whole thing, and believe me you want to, I have a Raspberry PI 3B+ with a UniFi Controller running on it. Via this controller you can keep an eye on your network, update your switches and WiFi points and see how your network is performing.
I will soon write a piece about how you can install and update the UniFi controller on your Raspberry.
Ubiquiti unifi home network buying list
What did I use for my Ubiquiti and unifi setup (note: links are affiliate links to Amazon):
Aantal
Product
prijs
100
€ 111,31 100/meter
20
€ 35,99 10/piece
4
€ 3,55 p/piece
1
€ 9,79 p/piece
1
Professinal universal cable tool
€ 11,24 p/piece
2
€ 32,34 p/piece
1
€ 64,47 p/piece
1
€ 14,83 2/piece
2
€ 17,99 2/piece
2
Ubiquiti US-8-60W Unifi Switch, 8-Poorts
€ 104,90 1/piece
3
Ubiquiti Unifi POE powered 4 port switch
€ 179,32 3/piece
1
Ubiquiti Unifi UAP-AC-Pro Wifi access point
€ 128,90 p/piece
2
Ubiquiti UniFi UAP-AC-M Wireless Access Point
€ 82,05 p/piece
1
€ 47,35 p/piece
1
€ 67,14 p/piece
Am I satisfied now? Well no, I think I am about 80% happy with my new network, but I have noticed that I still have poor or no WiFi reception in parts of the house. I had hoped that with 1 point in the house I had enough wifi everywhere, but the house has very thick floors and double-stone walls (yes inside the house). And Wi-Fi doesn’t like that.
The idea I have is that in the attic on the two outermost points of the sloping roof, I place 2 more PEO Unify UAP-AC-Pro Wifi access point points that radiate downwards. In this way I hope to get better WiFi in the attic and the rooms below. I have to run 2 cables again from the attic to my patch panel on the 2nd floor, and I know from experience that this is not easy. I’ll keep you informed.